Below you find Getting Started guide for the Commission Harvest plugin. Is your question not answered here, please se our FAQ or create a Support Ticket
Getting Started
- When you have signed up and/or purchased the plugin, you will receive an e-mail with a link to a .zip file.
- Download the .zip file and save it to your harddrive. (important to not unpack the .zip file)
- Login to your WordPress website.
- Now click on “Plugins” -> “Add New” -> “Upload Plugin”.
- Choose the .zip file that you have just saved to your harddrive -> Click “upload” -> Click “Activate plugin”.
- Now you are ready to begin setting up the plugin.
In order for the plugin to help you make more money on your WordPress blog, you will need to have created an account with at least one affiliate network.
The plugin currently supports these 15 different affiliate networks:
- Amazon
- Commission Junction (CJ)
- Rakuten
- eBay
- Shareasale
- 2Checkout (Avangate)
- ClickBank
- Zanox
- Awin
- Partner-Ads
- TradeDoubler
- Webgains
- Salestring
- TradeTracker
- Adtraction
Next step is to setup the affiliate network with your credentials within the plugin. See below for more information.
When you have an account with an affiliate network, you will need to setup the plugin like this:
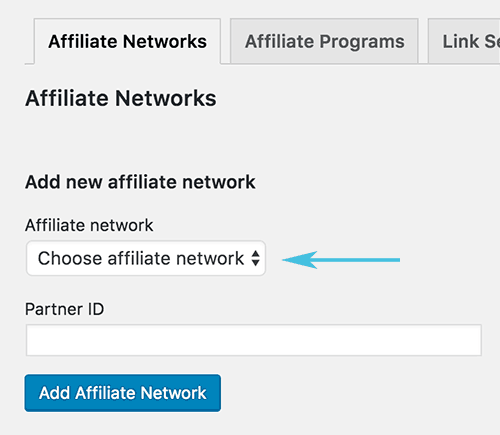
Click on Commission Harvest → Affiliate settings → Affiliate networks

Choose the network you want to add, enter your AffiliateID / PartnerID and click on “Add Affiliate Network”.
When you have added all your affiliate networks (see list of possible networks above), then you can move on to the next tab called “Affiliate Programs”.
Read more below.
At the moment it is possible to setup Partner-ads automatically. Click here to se how it is done
You can setup all affiliate programs manually. The term “affiliate programs” means the webshops that you have entered into affiliate deals with and whos products you are planning on promoting.
Follow this process:
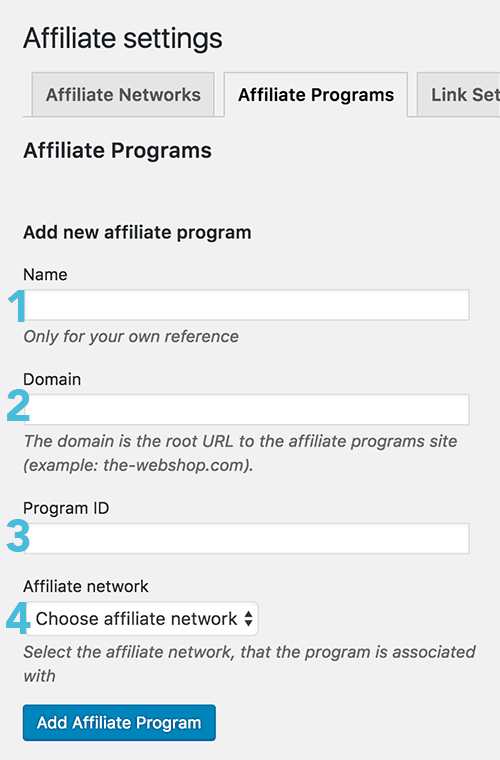
Commission Harvest → Affiliate settings → Affiliate programs
IMPORTANT! You must have setup at least one affiliate network in order to setup an affiliate program.

- Enter the name of the webshop you want to promote. You can choose to call it whatever you want but a “best practice” is to use the actual webshop name.
- Enter the root URL for the webshop. Example: target.com or walmart.com.
- Enter the “Program ID” for the webshop you’re setting up. With some Affiliate Networks it is called “Banner ID” or “Publisher ID” or similar. See how to find the ID for each supported Affiliate Network.
- Choose the correct affiliate network and click “Add affiliate program”
Get help to find partner is and program id here
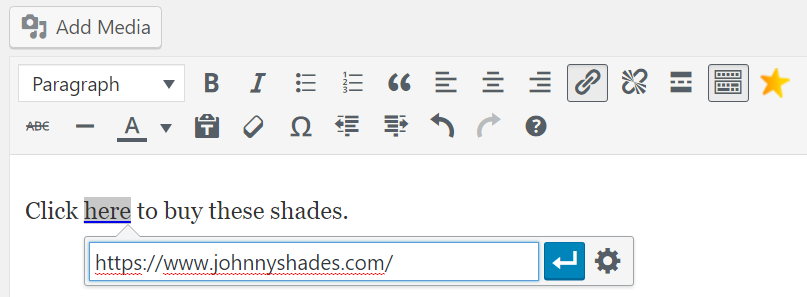
When the Affiliate Network and the Affiliate Program is setup correctly, the Commission Harvest plugin will do the rest. All you will need to do is enter a normal link / URL into your post or pages. If the root URL matches one of the programs in the list, the plugin will automatically create the affiliate link for users to click, so that you will earn a commission.
Important: The plugin does not change anything in your post or page. The only thing that changes is the URL that the user sees and click. Every “change” is made within the users browser.

It is set as a default that all affiliate links are opened in a new browser tab. If you want to change that, you can do it here:
Commission Harvest → Affiliate settings → Link settings
Since Google’s guidelines states that all affiliate links should have the nofollow attribution, the Commission Harvest plugin adds it as a default.
If you (for some reason) want to remove the nofollow tag, you can do it by going to:
Commission Harvest → Affiliate settings → Link settings
This is where some of the real power is and the plugin does everything for you.
It will use the powerful BALE™ engine and automatically check all your affiliate links to make sure that they are working as they are supposed to.
You can see a list of all the affiliate links managed by the plugin by going to:
Commission Harvest → Link checker
Since checking links can take up a lot of server power, the plugin is testing links in small batches of 10 links.
It will therefore take a little while when first installing the plugin. After the initial run through, the plugin will continue to check the links on an ongoing basis to make sure, that all links are working as they are meant to.
Cool Feature: Since almost all affiliate networks will have you link to them and then redirect to the merchant, the BALE™ engine within the plugin will test “several levels” of links/redirects. This is designed to make sure that if a merchant changes her site or cancels her affiliate program, you will get a warning that something is wrong. Normally you wouldn’t notice this as the affiliate network would just redirect you to one of their own pages instead of the merchant (bad user experience for your readers).
Each affiliate link can have 4 different status messages:
Green (200 – OK) = Means that everything is okay and working properly.
![]()
Orange (3xx – Found) = Means that the link is being redirected to somewhere else than originally planned and should therefore be checked manually
![]()
Red (4xx – Not found) = Means that there is something wrong with the link. Either is has an error or is no longer working for some other reason. Gives a bad user experience so should be fixed quickly
![]()
Red (Affiliate link error) = Means that the affiliate link is no longer sending the visitor to the intended root domain for the specific merchant
![]()
If a link returns a 3xx or 4xx error (orange or red) this can easily be fiex. Within the list of affiliate links you should just click “Quick Edit” and change the URL.
You can also easily change any other instances of the same URL by clicking the little ticker box below the URL box.
This is another really cool feature. If you already have existing manually created affiliate links on you website, the plugin can easily reconfigure them so that they too will be monitored by the plugin.
To implement this reconfiguration go to:
Commission Harvest → Affiliate settings → Other settings
YOUTUBE VIDEO
This will only work if you have already setup the affiliate networks as well as the merchants within the plugin. See point XX above
You can choose to only reconfigure selected links or you can reconfigure all. Just click the relevant boxes.
To make sure that the server isn’t overloaded, the process will happen in small steps and can therefore take a few hours to complete (depending on the number of affiliate links you have).
You will be able to see the process within the list as the links are reconfigured.
Updates will automatically be sent out via the normal WordPress update functionality. Before updating the plugin it is always adviced to make a backup of your website.
